How to Make Edible Diamonds?
September 1, 2022
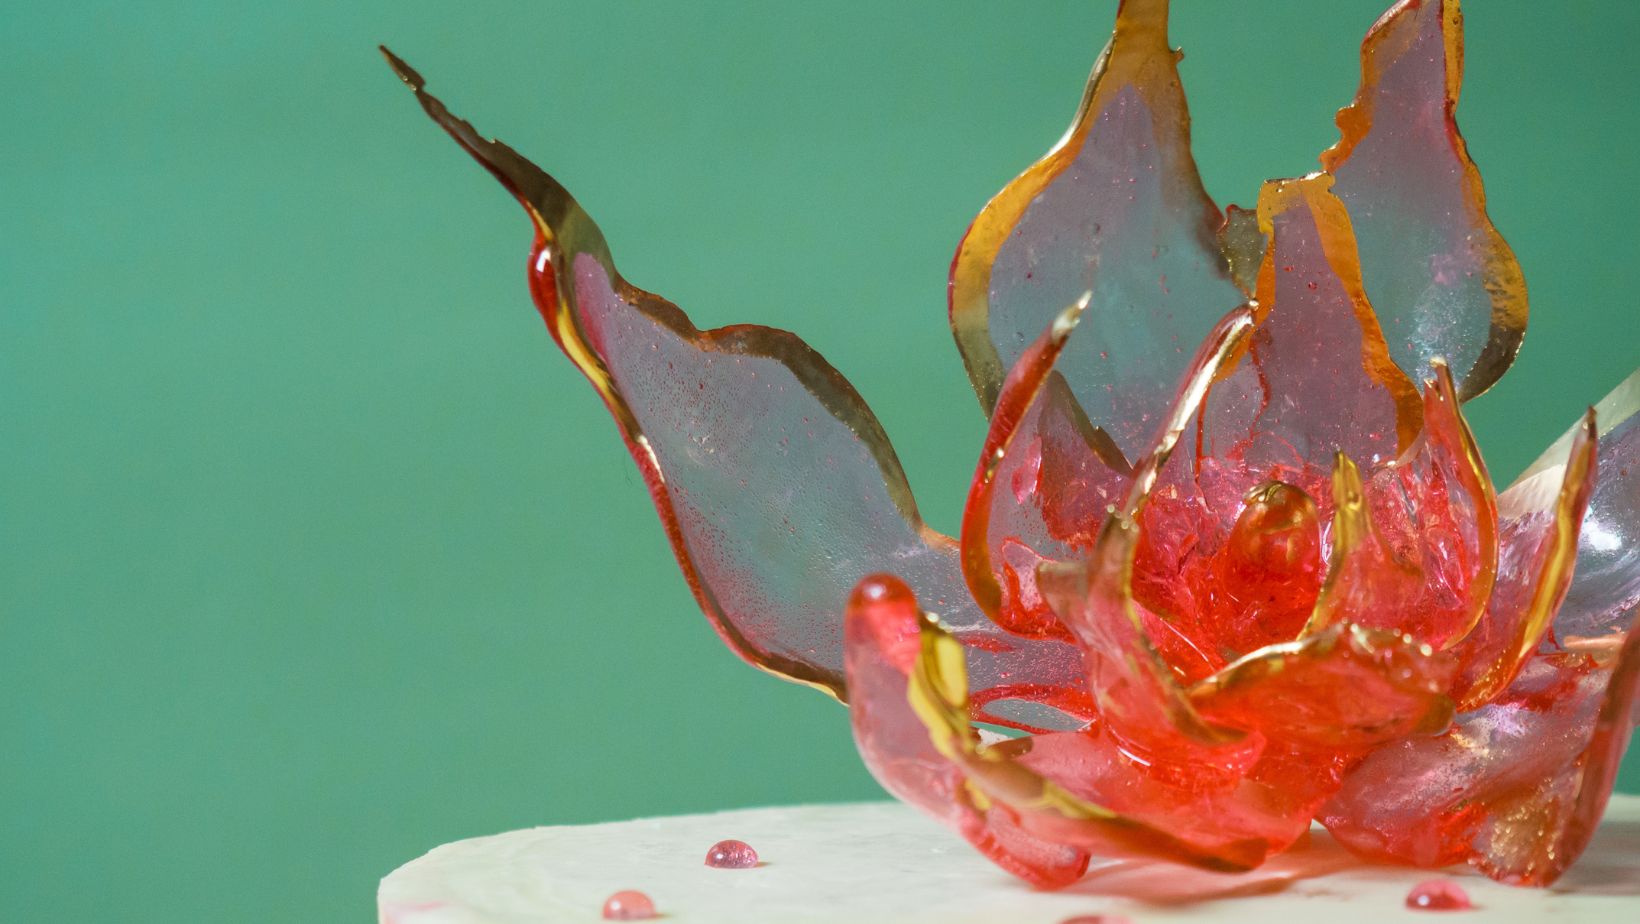
Cooking appeals to people’s need to express themselves creatively. Because of this, many people who like baking are turning to edible diamonds for their swanky appeal. You may now make a stunning piece of diamond jewelry that you can eat if you know the right formula. It is necessary to utilize a heat-resistant candy mold to create edible diamonds. Hard candy molds and colored isomalt bits may simply be used to create edible diamonds. People use isomalt to make edible diamonds. It is more transparent and more flexible than regular sugar. That’s what makes it excellent for sugar art. This particular sugar substitute is safe to ingest; however, it shouldn’t be overused. There are commercially available isomalt crystals, which must be heated on the stovetop. It’s also possible to buy isomalt nibs or venusance pearls pre-cooked. Venuance pearls and isomalt nibs are available in various hues and ready to use after melting. However, you can also prepare Isomalt at home, which we will discuss later.
“People use isomalt to make edible diamonds. It is more transparent and more flexible than regular sugar. That’s what makes it excellent for sugar art. This particular sugar substitute is safe to ingest; however, it shouldn’t be overused.”
When you are dealing with sugar, it’s easy for a standard chocolate mold to melt. A wide range of designs and diamond shapes are available for jewel molds. From the smallest to the most excellent diamonds, you have the ability to create them. In addition to diamond studs, you may make any other form you choose, like hearts and stars. You may use edible diamonds for decoration at every event. Let’s find out the steps to do this by making isomalt at home from scratch which can be used for a long time.
What is the Initial Step in Making Isomalt?
Things you need to make Isomalt and edible diamonds
- Use of a nonstick cooking spray
- Isomalt
- Toothpicks
- Hard candy jewel molds
- Measuring or baking cups made of silicone
- Parchment paper
- Oven mitts
- Scissors
Steps
- In a nonstick saucepan, combine Isomalt with water, and stir until it resembles wet sand (about 1:1).
- Bring Isomalt to a boil in a saucepan on a high-heat stove. Keep an eye on the temperature with a candy thermometer in the pot. When the water boils out; the mixture will bubble for a while and get trapped at 225 degrees Fahrenheit. Water prevents temperature increase. Once the water is removed, the temperature will increase, reducing bubbling.
- It is a perfect moment to add your colors to the mix if you want coloring for the product. As the freshly added liquid evaporates, the mixture will go wild with bubbles. Once the liquid has evaporated completely, the mixture will settle down. If the color is not uniform, use a long wooden stick to swirl it around.
- 338 degrees Fahrenheit is the ideal cooking temperature. At 333 degrees Fahrenheit, remove the pot from the heat and add 5 degrees to account for heat transfer.
- After you hear the hissing cease, put the pot back on the stove and turn it off. You may also let it cool on a folded side towel.
- Set your oven to 275 degrees and bake your pot of Isomalt for 15 minutes until it’s the right consistency to pour. Allow bubbles to escape when Isomalt reaches the pouring stage.
- You may start folding your parchment triangles while the Isomalt is cooling. You can also prepare your cup and molds at this time. Some folks find that spraying a little oil into their molds helps the gems pop out more quickly.
- Always use oven mitts or a pair of burn-proof gloves when dealing with Isomalt. Keep in mind that this is a pot of 300-degree molten lava, so use extreme care while handling it.
- Use the cup to hold the parchment bag as you pour the cooled Isomalt into the bag. Be careful not to burn yourself by holding the bag with your hands! Put the saucepan back in the oven for holding after adding roughly a half cup to the bag. Begin piping into the molds as soon as you’ve snipped the parchment bag’s tip.
- Take a break for 5 to 10 minutes and let it cool. Once they are cool enough, they should easily fall out of the mold. To keep Isomalt fresh for up to two years, keep it in airtight containers at room temperature.
For safety, set up an ice bucket nearby in case you are burned. Dip your hand or anything into the basin to put out the flames instantly.
What Are the Steps for Making Edible Diamonds?
First Step
Apply cooking spray to the hard candy mold. To remove any remaining residue, use a paper towel.
Second Step
Place isomalt or full venuance pearls in a silicone baking cup or measuring cup. Microwave the boiling sugar in 5-second intervals until melted. Stir the Isomalt you have made with a toothpick to remove any bubbles.
Third Step
Make the nozzle of the baking cup bigger by squeezing it gently. Pour the candy into the molds one at a time. Fill the cavity to the brim, but don’t go overboard with the filling of your edible diamonds.
Fourth Step
To cool down, remove it from the heat source. Put a soft cloth on top of a parchment or silicone surface and flip the mold over. Make a silicone pad out of the leftovers and store them for future use.

The edible diamonds are done, and then they should be kept dry by storing in a sealed jar with silica gel packets.
How Do You Create Sugar Diamonds?
- Melt two tablespoons of corn syrup in a small saucepan with 1-1/4 cups sugar and 1/4 cup water using a candy thermometer. The syrup has a temperature of 300 degrees.
- Add ice cubes to the second batch once it has cooled for three minutes.
How to Attach Edible Diamonds?
Cake diamonds may be held in place using powdered glazes or royal icing coated in edible glue or non-water-based edible glue. There will be an exception for the colored gems, which need royal icing, and it doesn’t show through them.
How do you make Edible Glaze?
A mixture of two parts vodka and one part corn syrup should be well dissolved before serving. You may use gum paste or fondant to give it a long-lasting sheen if it isn’t already.
Is there an Isomalt Substitute?
Isomalt is a sugar replacement; thus, it may be used in the same way as sugar. Alternatively, you may use cornmeal, sugar, and water to create festive decorations.
How Making Edible Diamonds With Kids Will Be Beneficial for Them?
Creativity Is Fostered
Teaching children to make edible diamonds will be appealing. You will get to see their boundless imagination. They will amaze you with their inventiveness and initiative.
Fewer Screen Times
For kids, cake decorating with edible diamonds is an excellent method to keep youngsters connected and off their devices.
According to most parents, children nowadays spend too much time looking at devices. While making the edible diamonds of various diamond cuts, the kids will have fun and will spend less screen time.
Keeping the Kids Occupied Will Be Easy
A continual challenge is to keep children amused, particularly over the holidays. Edible diamond-making sessions for young children are a great way to keep them occupied and out of yours. Youngsters prefer to concentrate on things they like, and we have heard from many parents that children love making edible gems.
Builds confidence
Seeing a child’s face light up after they have produced a beautiful diamond on their own is rewarding. It may boost their professional pride by challenging them to do something new.
Develop Fine Motor Skills
After the edible diamond is done, you have to decorate the cake. Working with icing may aid in developing fine motor skills in children younger than seven. Older children may use it to improve their coordination, accuracy, and detail awareness.
All of these tasks will help you develop craft skills for several mediums. Such as cutting fondant flowers and modeling a worm. Youngsters rapidly learn how to decorate cakes using several techniques.
Teach Your Kids About Basics
Students will learn how to handle cooking equipment, combine essential recipes, and create their own. It’s a great way to learn about art, science, math, and English while having a good time.
Final Words
There are several applications or recipes for edible diamonds. During wedding planning, you can add this as an elegant touch to a wedding cake may be achieved by using gems like diamonds. After reading this informative guide, you can fill a pirate treasure chest with gems or dress up a princess tiara with edible diamonds. Adding jewels to wedding shower cakes and cupcakes is also a terrific idea!
Amanda Davis
Amanda is the proud owner and head cook of her very own restaurant. She loves nothing more than experimenting with new recipes in the kitchen, and her food is always a big hit with customers. Amanda takes great pride in her work, and she always puts her heart into everything she does. She's a hard-working woman who has made it on her own, and she's an inspiration to all who know her.
Beef Archives
“Beef Archives” is the first in an ongoing series of meat-related posts. This entry will

One Pan Chicken Thighs | Lemon Sauce!
The chicken I grew up eating was not only tender and juicy, but also packed with flavor. These Chick

Easy Baked Creamy Caesar Chicken — ONLY 6 INGREDIENTS!
It’s that time of year again! When winter is finally over, and we are blessed with warmer weat